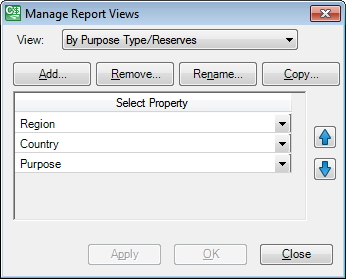
Manage report views
The Manage Report Views window allows you to manage sorting criteria used to display the list of projects on

To add a new view:
- Click on the Add button.
- In the pop-up window, type the view's name and click OK.
- The view will appear on the list in the View field, and an empty table will be displayed.
- Right-click anywhere on the table to add properties. If you select several properties, projects will be grouped on several levels; for example, a view shown in the image above will group projects first by region, then by country, then by purpose and then by reserve type.
- Click Apply to save the view. Click OK to save the view and close the window.
You can create a new view by copying an existing one. Select the source view in the View field and click on the Copy button. In the pop-up window, type the name of the new view and click OK. The copied view will be displayed.
To delete a view, select it in the View list and click on the Remove button.
To rename an existing view, select it in the View field and click on the Rename button. In the pop-up window, type the new name and click OK. The new name will appear on the list in the View field.